
Today I'm going to share with you how I finished up the upholstered headboard and a peek at the final product! I had lots of snags in finishing this up so that's why it has taken me so long to post this!
Firstly, I figured out how to do the corners! What do you think? I think it turned out pretty well!

I couldn't use the same material I upholstered the headboard with to make the buttons because it was too thick and didn't fit into the buttons I bought. So I headed to Fabricville with my fingers crossed. A nice lady who worked there helped me find a similar matching material in the clearance section (I would not have found it without her) and I finally made the buttons:

As you can see the colour is not exact, but wait until you see it all laid out- you will not be able to tell that it's different.

I had already set out where each button would go on the back and hammered a nail hole where I thought I could fit some wire through. My plan was to put wire through the hole I made in the back and pop it through the front and attach a button to it.
Thus started my second problem. The wire made it through the wood and the batting no problem, but I forgot to calculate how thick the vinyl is, the wire would hit the vinyl and bend. I then decided to use a screw and make each of the 20 button holes bigger.

I strung two beads on my wire so it wouldn't just pop all the way through the back.

Then carefully wrapped the wire tightly around a long thin nail


I was very careful to make sure it was tight around the tip
I then hammered/pushed the nail through the bigger hole thus pushing the wire through with it.

Here you can see what it would look like coming through the front.

Then I would attach a button and pull tight and wrap the wire around to hold.

I did this one slow button at a time...

After getting all the buttons on (a process that took hours!) I needed to attach the headboard to the bed. In comes my handy man Jetty. We bought some wood, and attached it directly to the head of the bed on both sides.

We used washers so that the screws would hold the frame on:


We then held the headboard up and made sure it was level and drew where we would be attaching the wood:


Jetty then screwed three long screws on the backside to each beam to hold the headboard on.

Here it is in process!:

I am so excited about this project because I think it makes a huge difference in our bedroom. I'm so thrilled to share the following pictures with you, and yes, we picked diamonds- but a very sparse pattern. I hope you love it as much as I do!
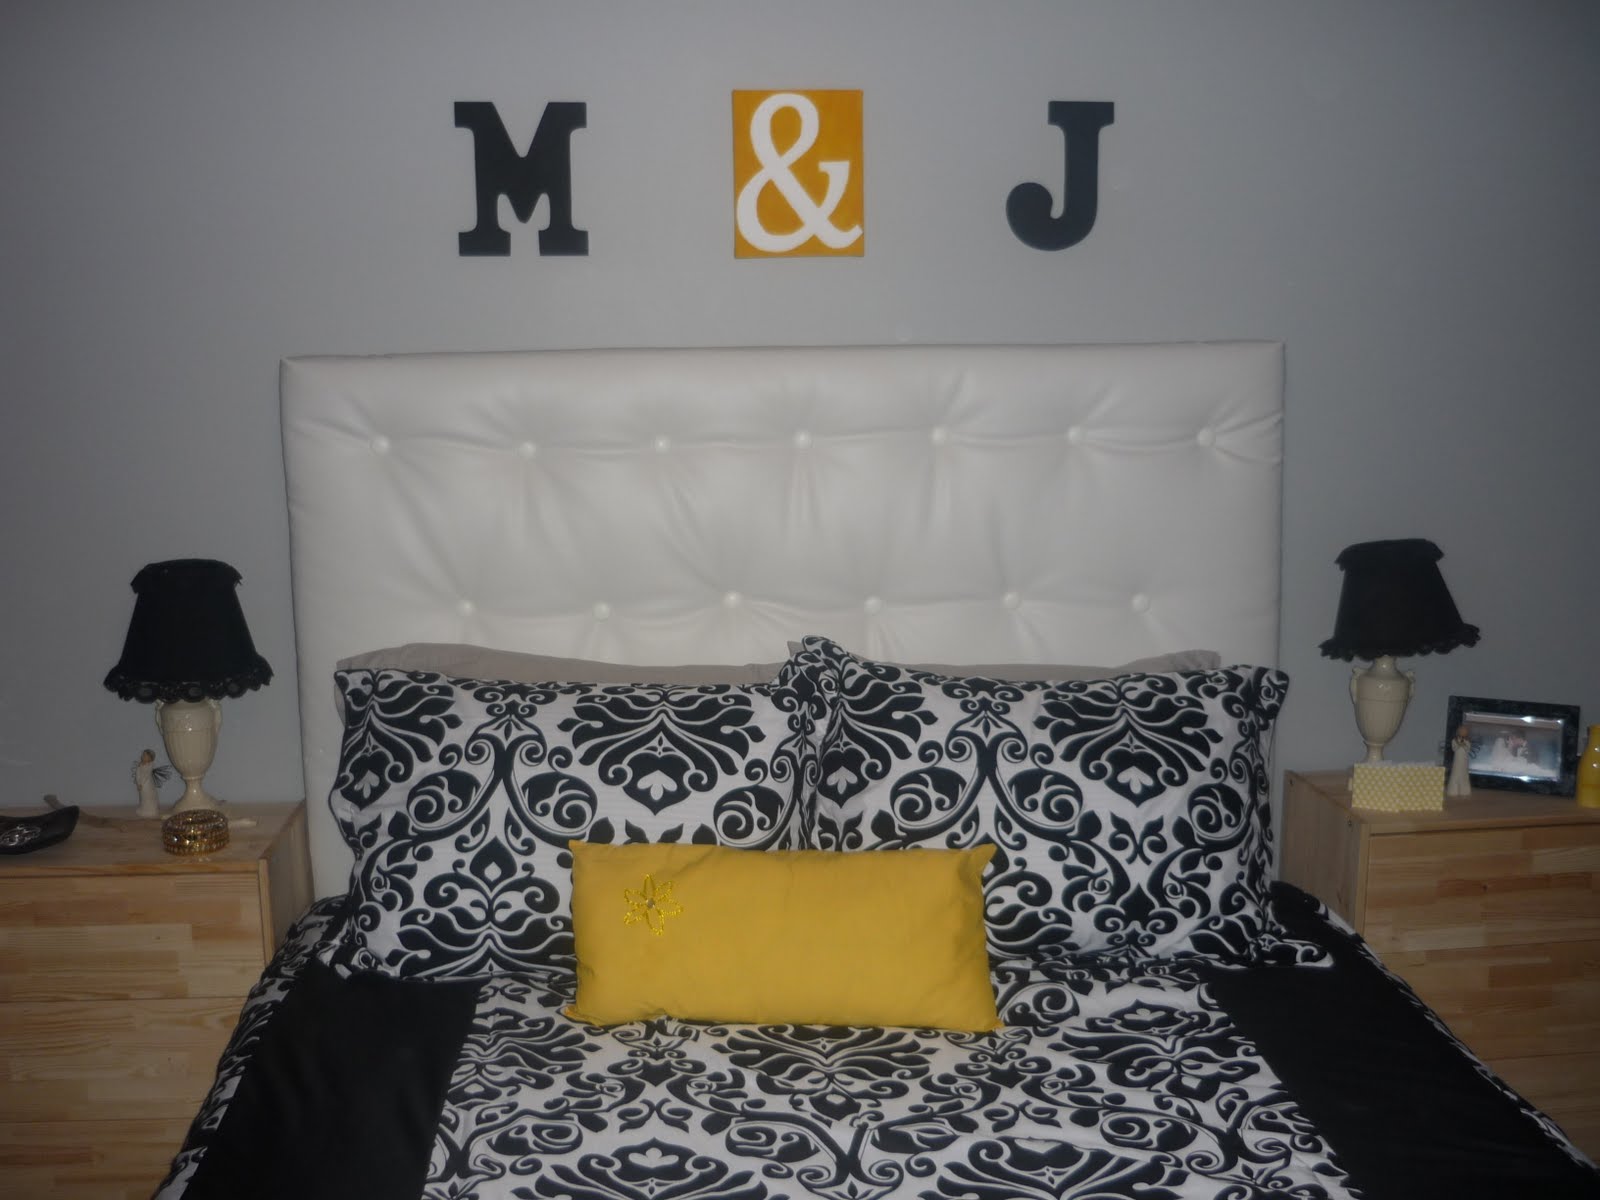


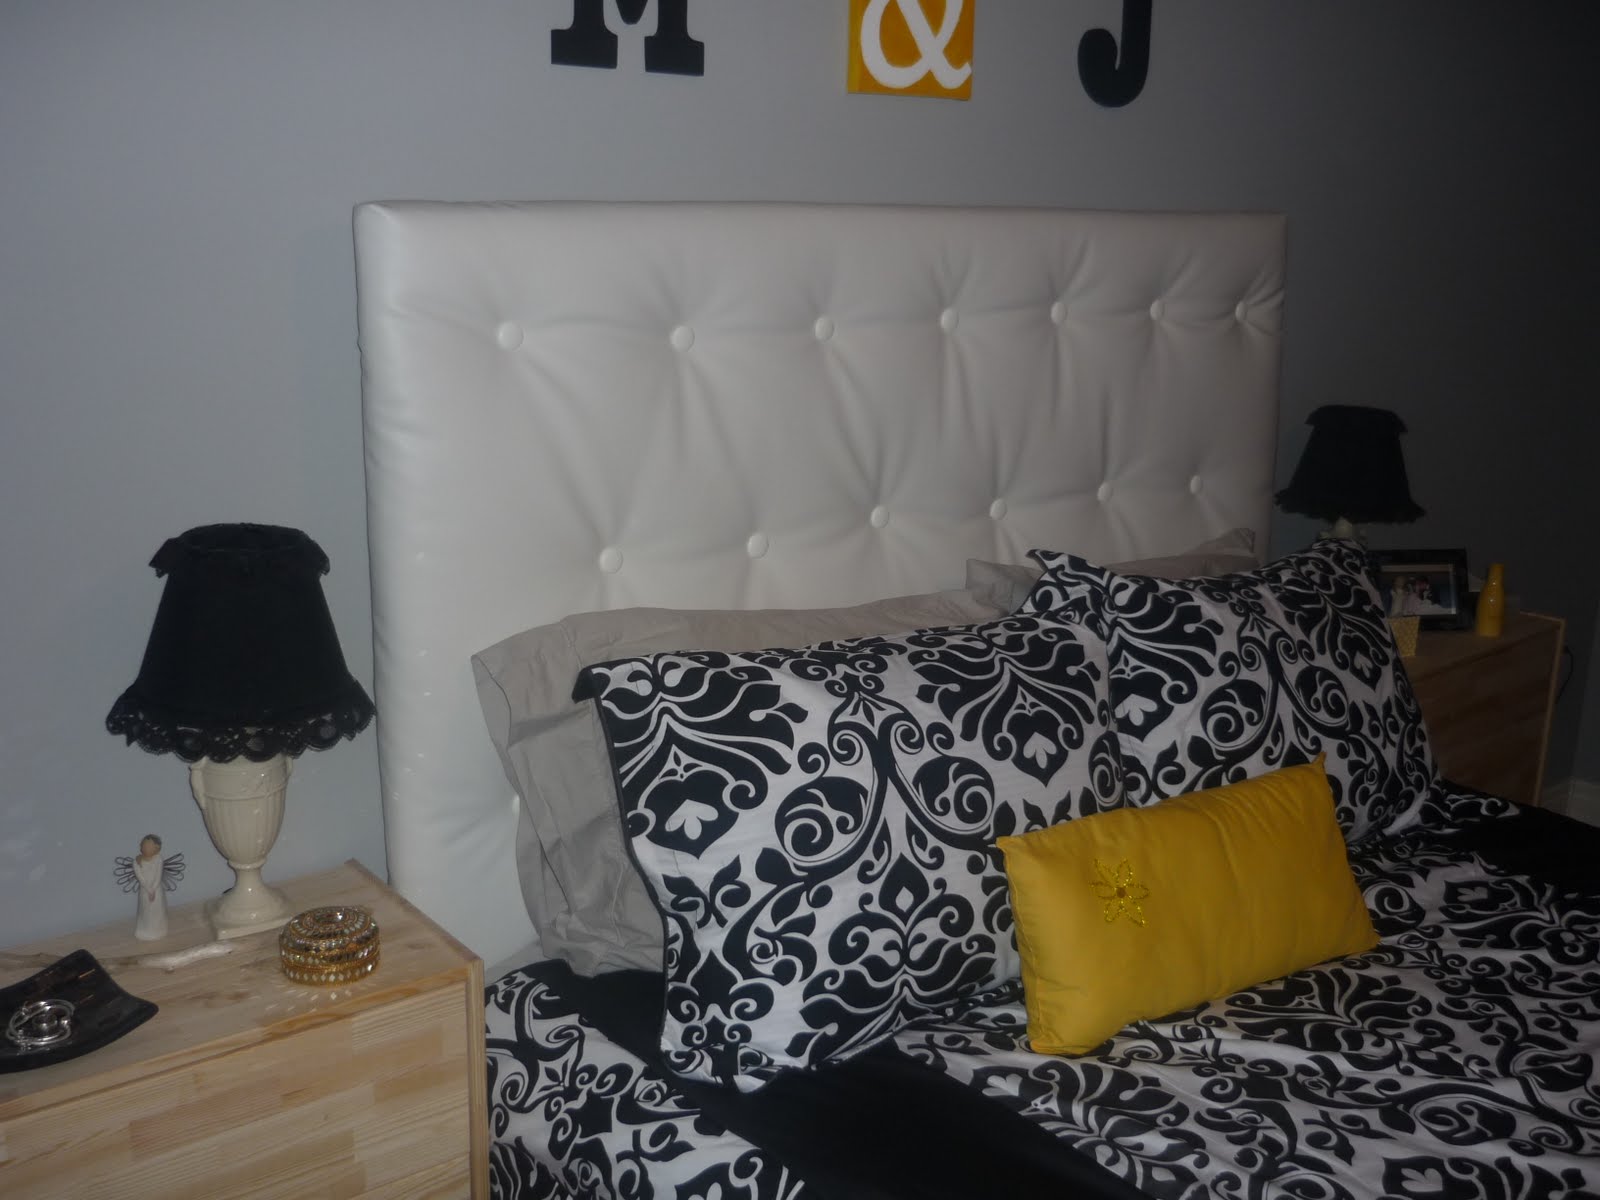
Thoughts? Questions?

WHAT a lot of work Melanie! Kudos to you for sticking with it! It looks great! I can't see a difference in the color at all. I know it's padded - is it as soft as it looks?
ReplyDeleteYou are so creative! We love it.
ReplyDeleteBrian & Sharon
You are so unbelievably creative!
ReplyDeleteI think it looks great and I can not wait for the next project !!
ReplyDeleteWell well, would you look at that.. you proved me wrong, the diamonds look amazing! Your awesome! When you gonna make me one?!
ReplyDeleteThanks for the lovely comments! Glad you like it too!
ReplyDeleteYes, it really is very soft! You will have to come see it in person sometime!
Hi Melanie,
ReplyDeleteWow, looks like you have a lot going on in your life right now....congratulations!!!
This is really cool, it totally reminds me of when I was first married, thanks for taking my back in time:)
You and "J" are DIY'ers to huh? Go on with your bad selves! Looks great.
Take care, look forward to seeing you around!